My last post was about configuring additional Service Principal Names (SPNs) in Active Directory to support the use of Integrated Windows Authentication (IWA) in a SAS® platform installation that uses host name aliases in preference to physical ho…
Tag: windows
SAS & IWA: Host Name Aliases and SPNs
I’m quite keen on using host name aliases, rather than their physical host names, when referring to machines in SAS® platform installations. It does however mean a little extra configuration is required when using Integrated Windows Authenti…
SAS & IWA: Verifying Trusted for Delegation Status
I mentioned in a previous post that host machines need to be Trusted for Delegation when a SAS® software component, such as a SAS Workspace Server, needs to make outgoing connections to secondary servers when the initial incoming connection was ma…
SAS and IWA: Two Hops
In an earlier post I mentioned that I would jot down a few notes about my experiences with SAS® software and Integrated Windows Authentication (IWA). This is the first of these posts and concerns the initial configuration. Chances are, if you knew…
SAS and IWA (Integrated Windows Authentication) Notes
Over the past year I have worked on a number of SAS® 9.2 platform installations helping to get Integrated Windows Authentication (IWA) working nicely for single sign-on (SSO) for the SAS platform. Whilst it’s relatively easy to turn IWA on, …
Using SAS92HFADD behind a “tough” firewall using CURL
As I have mentioned previously in Using SAS92HFADD behind a firewall, the SAS 9.2 Hot Fix Analysis, Download and Deployment tool is a great utility for the SAS Admin to help keep their SAS environment up to date with all the latest hot fixes from SAS. I routinely implement this as part of deploying SAS, and in most cases the tweaks I mention in my previous blog post are all that is needed. Unfortunately during one deployment I was faced with an outbound proxy/firewall that required Windows authentication…
The Problem
The organisation I was working with required all outbound internet traffic to pass through an authenticated proxy/firewall server. For normal internet access from a PC this all happens seamlessly via their Windows network. i.e. A user logs into their PC using their Windows credentials and then any network resource requiring authentication would negotiate using those credentials “behind the scenes” – probably using NTLM, SSPI or Kerberos. The SAS92HFADD tool uses the File Transfer Protocol (FTP) and the command line FTP client provided with Windows doesn’t support using proxy servers nor can it negotiate using NTLM, SSPI or Kerberos (that I know of). The solution that I chose was to use CURL – an open source command line tool for transferring files via a number of protocols (FTP, HTTP, etc.) that also supports proxies and authentication.
I have only done this on Windows servers, but I’m sure the same basic premise should work on Unix/Linix servers to get through a Windows based proxy/firewall as well.
Windows
1. Download the SAS92HFADD package
The download is a self extracting archive which when run will provide three files:
- SAS92HFADD.exe
- SAS92_hot_fix_data_ftp_download.bat
- SAS92_hot_fix_data_ftp_download_script.txt
2. Download CURL
CURL can be downloaded from http://curl.haxx.se/download.html. The CURL package that you download should have the SSPI option compiled into it. The package that I used was Win32 2000/XP 7.21.6 binary by Günter Knauf 1.32 MB.
3. Extract the CURLy bits
The CURL ZIP file that you downloaded has four files that you need to extract into the SAS92HFADD directory:
- curl.exe
- libcurl.dll
- libeay32.dll
- libssl32.dll

Your SAS92HFADD directory should look like this:
4. Modify SAS92_hot_fix_data_ftp_download.bat
Replace the entire contents of this file with the following single line:curl -U : -x internetproxy:8080 --proxy-ntlm -o SAS92_hot_fix_data.xml http://ftp.sas.com/techsup/download/hotfix/HF2/util01/SASHotFixDLM/data/SAS92_hot_fix_data.xml
internetproxy:8080 should be the name and port of your proxy server
5. Run SAS92HFADD.EXE
After adding the DeploymentRegistry.txt file into the sas92hfadd directory, the next thing I did was open a command prompt (cmd.exe), change into the sas92hfadd directory and execute the sas92hfadd program:
This will connect to SAS and do it’s magic, resulting in a time-stamped subdirectory containing the AnalysisReport, DownloadTools, DeploymentTools and Logs directories.
6. Modify ftp_script.txt
Navigate into the DownloadTools directory and you should find the following files:
Open ftp_Script.txt in your favourite text editor and get ready for some search + replace fun!
Here is my file before any changes:
The first string we want to find is: get techsup
This should be replaced with the following (changing internetproxy:8080 to your proxy and port): curl -U : -x internetproxy:8080 --proxy-ntlm http://ftp.sas.com/techsup
The above string is all one line.
The second string to change is:..\
This should be replaced with:-o ..\
There is a SPACE between “-o” and “..\”.
The next step is not a simple search and replace, but changing the first four lines of the file from:open ftp.sas.comanonymousSAS92HFADD@sas.combinary
to:@echo offset PATH=..\..;%PATH%
And finally, removing the last line that contains “quit”.
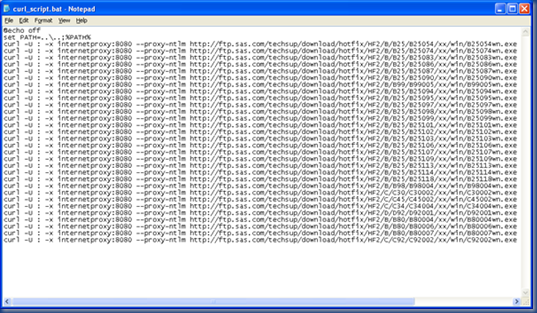
The final file looks like:
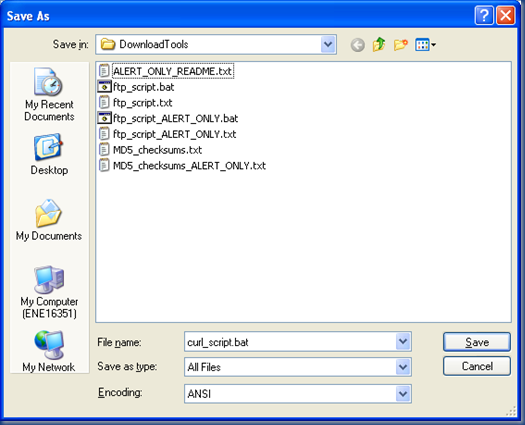
Now we can save this file as “curl_script.bat”
7. Download the Hot Fixes
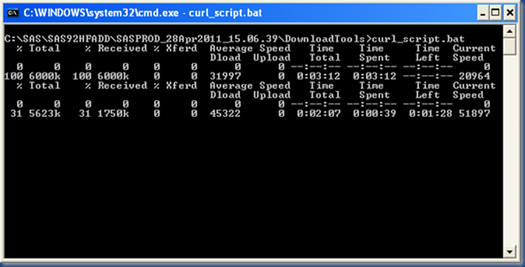
Now we can execute the curl_script.bat file (instead of the ftp_script.bat file) to download our hot fixes.
8. BAU
From here on it is Business As Usual ![]()
The above is all “experimental” as I have only had to go to these lengths on one customer site – your mileage may vary, but I hope if you do come across this situation these steps will help you develop your own solution.
Platform Suite for SAS – Dev/Test/Prod Tips
Here are some of my tips for using the Platform Suite for SAS when you have Development, Test and Production environments to support your SDLC.Install and configure one instance of Platform LSF and Platform Process ManagerIf you have separate machines …
Using SAS92HFADD behind a firewall
The SAS 9.2 Hot Fix Analysis, Download and Deployment tool available at http://ftp.sas.com/techsup/download/hotfix/HF2/SAS92HFADD.html is a fantastic step forward by SAS in helping SAS Administrators keep their system up to date. Paul Homes from Metacoda has previously blogged about this tool and how (much fun it is) to get it working under Windows 2008 R2 with UAC enabled – http://platformadmin.com/blogs/paul/2011/01/sas92hfadd-viewregistry-windows-server-2008-r2/
I have used this tool on quite a few sites (on Windows, Unix and Linux) and once it is working it is great! Unfortunately I estimate it has only worked “out of the box” for 1 in 10 installs, and the reason is usually a firewall. This blog post describes my workarounds to this situation…
The Problem
The SAS92HFADD tool uses the File Transfer Protocol (FTP) to download various files from the SAS FTP site. If the machine running this tool is behind a firewall (which should be the standard situation in a corporate environment) then “normal” FTP may not work. One method implemented within the file transfer protocol to allow communication through some firewall implementations is “passive” mode. There are some tweaks we can make to the files provided by SAS as part of this package to get it to use passive mode, but unfortunately the FTP client provided with the Windows operating system does not support passive mode (see http://support.microsoft.com/kb/271078). The Unix/Linux FTP clients I’ve seen will support passive mode without any problems.
Unix/Linux
Downloading the Unix version of the tool and untarring it will result in two files:
- SAS92HFADD.pl
- SAS92_hot_fix_data_ftp_download.sh
A common way to invoke FTP in passive mode on Unix/Linux is to use the “-p” switch. We can tweak the two files provided above to add in this “-p” switch and have the FTP transfers done in passive mode.
SAS92_hot_fix_data_ftp_download.sh
The 5th line of this file reads: ftp -n $HOST <<-EOF
Add in the “-p” switch and save the file: ftp -p -n $HOST <<-EOF
SAS92HFADD.pl
The 646th line of this file reads: $ftpscript .= "ftp -n \$HOST <<-EOF\n";
Change this to: $ftpscript .= "ftp -p -n \$HOST <<-EOF\n";
Under Unix/Linux these are all the changes that are required. Following the provided instructions from SAS should now work.
Windows
The Windows version of the tool requires a bit more work since the Perl code that we could have edited (as above with the Unix version) is packaged into an executable file along with a Perl runtime. The download is a self extracting archive which when run will provide three files:
- SAS92HFADD.exe
- SAS92_hot_fix_data_ftp_download.bat
- SAS92_hot_fix_data_ftp_download_script.txt
Unfortunately we can’t just start tweaking things because, as mentioned above, the FTP client provided with Windows does not support passive mode. There are a number of FTP-like command line tools that you can get for Windows (and in a later post I will explain how I used CURL to get the Windows tool to work through a “tough” firewall configuration where passive mode was not enough), but I highly recommend MOVEit Freely by Ipswitch File Transfer. This is a “drop-in” replacement for the Windows FTP client which supports passive mode. You can download MOVEit Freely from http://www.ipswitchft.com/Products/MoveitFreely/
Once you have downloaded MOVEit Freely copy the “ftps.exe” file into the SAS92HFADD directory created by the tool and rename it to “ftp.exe”.
Step 1 – Edit SAS92_hot_fix_data_ftp_download_script.txt
The fourth line of this file has the “binary” command and line five has the “get” command. Insert a line after line four with the “passive” command. I also like to see that something is actually happening, so I also insert the “hash” command which prints a hash mark (#) after a certain amount of bytes have been downloaded giving you a kind of progress status.
Here is my edited file:
open ftp.sas.com
anonymous
SAS92HFADD
binary
passive
hash
get [long path removed to fit in blog post]
quit
Step 2 – Run the SAS92HFADD.exe file
Running this file will call the batch file, which includes the script we just edited, which then downloads an XML file from SAS of all the latest hot fixes. It then parses this file and compares if to the DeploymentRegistry.txt file you created (as part of the standard steps of this tool) and then generates the Analysis Report, Download scripts and Deployment scripts.
Step 3 – Modify the generated download batch and script files
The tool dynamically creates a DownloadTools subdirectory under a time stamped parent directory within the SAS92HFADD directory. Depending on whether you want all hot fixes or just Alert hot fixes you then need to edit the appropriate batch and script files. I will edit the “all hot fixes” files, but the changes are the same for the Alert only files.
ftp_script.bat
This file needs to use the MOVEit freely FTP client, so you can either copy our new “ftp.exe” into this directory or edit the batch file to use the one we already have in the SAS92HFADD directory. I edited the batch file to use my existing copy (i.e. prefix the ftp command with “..\..\”): ..\..\ftp -s:ftp_script.txt
ftp_script.txt
Like the previous text file edit, we need to insert the “passive” command and the “hash” command if you like to see the progress:
Here is the top of my ftp_Script.txt file after the edits: open ftp.sas.com
anonymous
SAS92HFADD
binary
passive
hash
get [long path removed to fit in blog post]
Step 4 – Run the ftp_script.bat file
From here it should be back to the “normal” instructions.
